Hammer
Center Punch
Spot Weld Cutter (link above)
A few steel, sharp chisels (I would buy these from Harbor Freight because you'll likely destroy the blade...)
Drill
Pliers
*Optional but makes things much easier - Angle Grinder with Cutoff wheel and grinding wheel (or sandpaper disc)
Now, to start, I unbolted the braces from the firewall to the shock tower, so I was left with just the shock tower brace. You can look closely at the brace and notice there are about 5-6 spot welds holding it on. I used the cutoff wheel to cut off all the extra material that isn't welded. This isn't an option if you want to keep them; it just makes it easier to get to the back side.
First things first - this will take a while! Go very slow, doing one step at a time, and you'll probably have to switch between the different methods frequently to prevent cutting through.
To start, hammer the center punch into the little divets (spot welds). This will be where the drill bit is centered.
Next, place the drill bit into the drill and put the center pin into the punch location. Accelerate the drill before pushing it into the material. These bits "walk" very easily, and you don't want to screw up the center punch park, because drilling a straight hole will become very difficult. The approach you want to take when drilling through the material is several quick, small, pushes of the drill into the material. Remember, the pin is spring-loaded, so that is somewhat helpful. Don't sit on the drill and grind it down into the material because you are sure to go right through both pieces of metal.
Here's a picture of the drilling being started (bottom of image) and one that is already done (center of image).

After doing this for a few seconds, switch over to the hammer and chisel. Place the chamfer-side against the shock tower, and chisel a bit, just to pry the two pieces of metal apart, and (very slowly) bend it upwards. I'm only talking like 1/32" - not a lot. Chisel around all sides of the hole you just drilled and you'll slowly see that the metal is starting to separate. If, when doing this, you need to drill a little more, switch back, drill some, then chisel some more. Slow and steady wins the race :-)

After a bit of this, you'll notice that the chisel will separate the cylindrical slab of "spot weld metal" from the shock tower brace - this is exactly what you're going for. You can move onto the next spot weld, and later you can go back over this with a grinding disc or a sandpaper-disc to grind it flush with the shock tower.


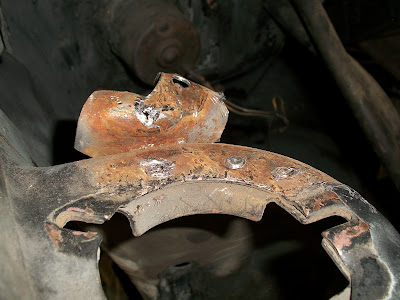
Here are the spot welds, with the shock tower brace completely cut off.

Here is how they look finished; drilled out and sanded down to the shock tower.


*******************************************
Another thing I worked on last week was getting my pedals and Pedal Support Brace all painted. Everything has been cleaned and is ready to be installed the in car. After the support bracket was welded with the ballbearing clutch conversion kit pieces, I painted it. I also removed the pads from the pedals and painted them as well (after sanding them down of course). I think it turned out fantastic - here's how everything looks:


*******************************************
The last chore of the week was removing paint from the engine bay. Someone had suggested Easy-Off Oven Cleaner, which didn't do much as far as paint removal (it did remove some, and it removed quite a bit of grease...just not what I was looking for). So I did some research and went with a non-toxic cleaner named Citristrip. I plan on getting some before and after pics this week to show the cleaner's progress.
Still no news on the T-5. The guy who owns the shop that builds them has been out of the office, conveniently, every time I call.
Well that's about it for today. Busy week ahead...

2 comments:
I like the pedal trim rings. I'm going to go with the same look.
Thanks! I really like the look as well.
Post a Comment