Makes/models/years that had the Ford 8" rear. Gear ratios are unknown at this time, but expect the usual - >4.00 in the high-end models, <3.00 for the gas-savers, and between 3.00 & 4.00 for most everything else.
| FORD | E-100 | (1968 - 1974) |
| FORD | FAIRLANE | (1962 - 1967) |
| FORD | FAIRMONT | 1978 |
| FORD | FALCON | (1964 - 1970) |
| FORD | FALCON SEDAN DELIVERY | (1964 - 1965) |
| FORD | GRAN TORINO | (1972 - 1976) |
| FORD | GRANADA | (1975 - 1978) |
| FORD | LTD | (1965 - 1978) |
| FORD | LTD II | (1977 - 1978) |
| FORD | MAVERICK | (1970 - 1977) |
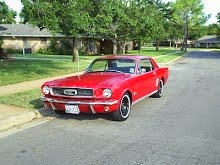
| FORD | MUSTANG | (1964 - 1973) |
| FORD | MUSTANG II | (1974 - 1978) |
| FORD | PINTO | (1971 - 1980) |
| FORD | RANCHER | 1972 |
| FORD | RANCHERO | (1964 - 1978) |
| FORD | TORINO | (1968 - 1976) |
| MERCURY | BOBCAT | (1975 - 1980) |
| MERCURY | CAPRI | (1970 - 1978) |
| MERCURY | COMET | (1962 - 1977) |
| MERCURY | COUGAR | (1967 - 1970) |
| MERCURY | COUGAR BOSS 302 | 1969 |
| MERCURY | COUGAR BOSS 429 | 1970 |
| MERCURY | COUGAR COBRA JET | (1969 - 1970) |
| MERCURY | COUGAR XR-7 | (1967 - 1970) |
(Info from Rockauto)
While it's not the best idea to install a used Ring & Pinion, I wouldn't think ill of it if you found a low mileage car that looks like it's be taken care of, and installed a R&P that had minimal wear.
My goal is to find a 3.25 Open Diff ring & pinion, in good shape. New gears are ~$180, plus a rebuild of ~$200. Cutting costs is half the battle with my Mustang, and so if I find a good set, I'll use it.